Sheryl Rubio.
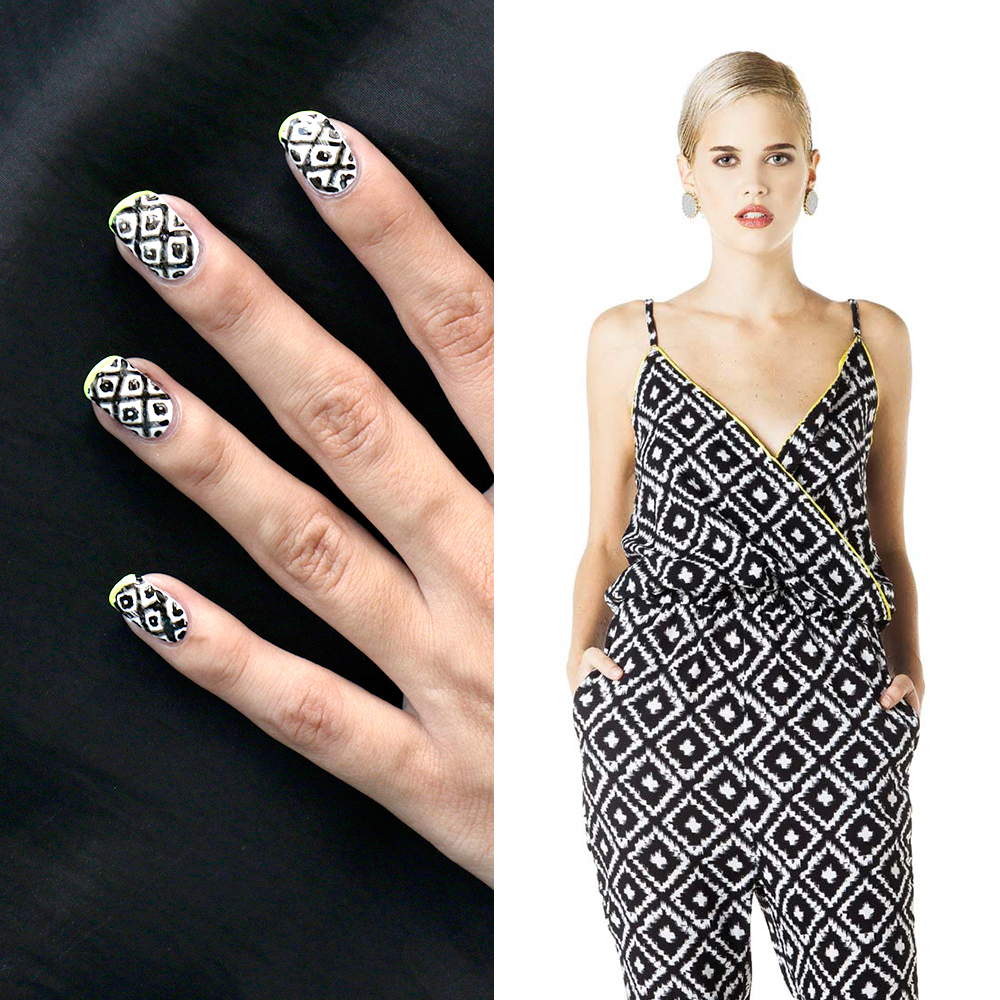
For this Trendy 30th, inspiration came from the new project of one of the most talented and beautiful persons that exist in the Venezuelan show biz: Sheryl Rubio. She is a young actress and singer that just launched her new collection in partnership Melao and I have to say that every piece is just amazing, so, I chose one of them to make this post. It took some time, but finally I decided for the Cappuccino Jumper, the pattern and the neon touch are just perfect for nailart.
The best part about this post, and why it is a special one, is that I was once was lucky enough to meet Sheryl in person a few years ago, and without a doubt, I can say that she is not just talented but also great human being, really authentic and has a great attitude. I’m really happy for her, if you want to know more about she and her collection, just look for the hashtag #SherylRubioParaMelao.
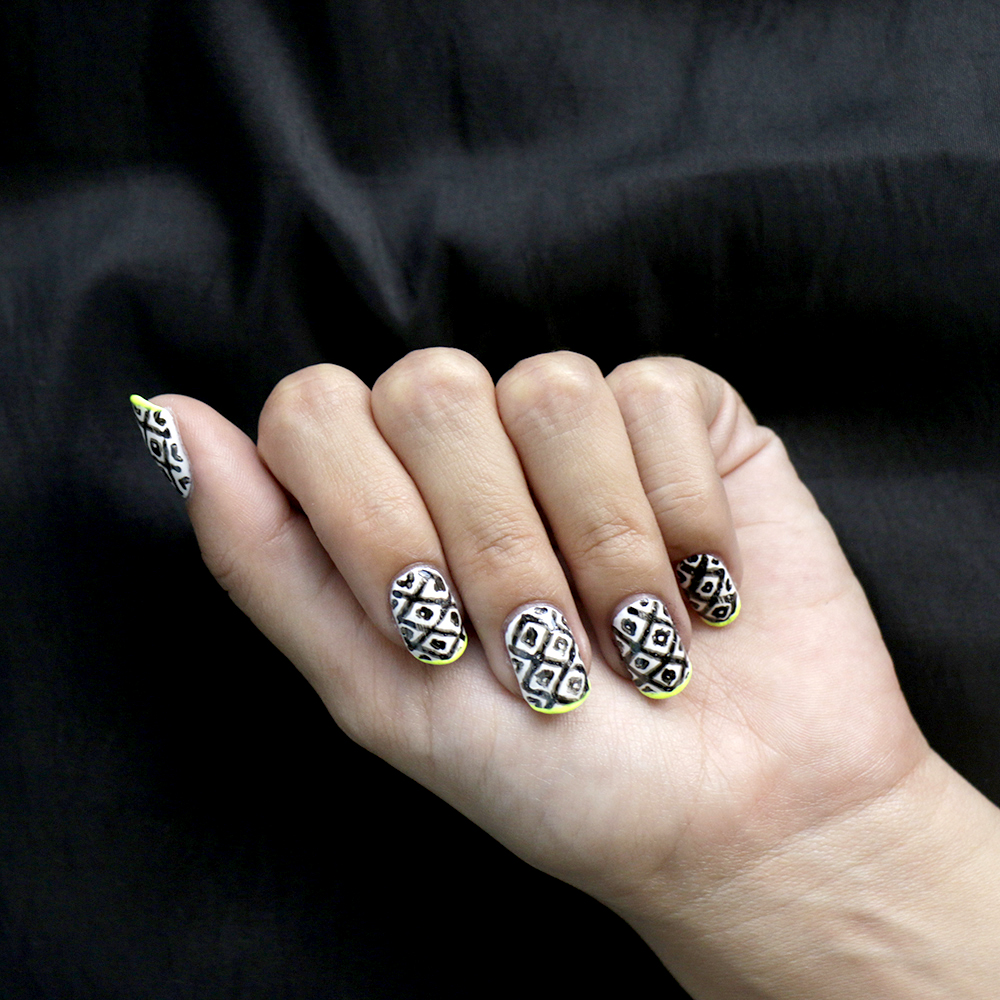
Now, back to the mani, I have to admit that the pattern was more difficult that I thought, because the pattern is iregular and I’m still working to reach that effect. Having that in mind… this is my step by step for the Cappuccino Jumper’s nails:
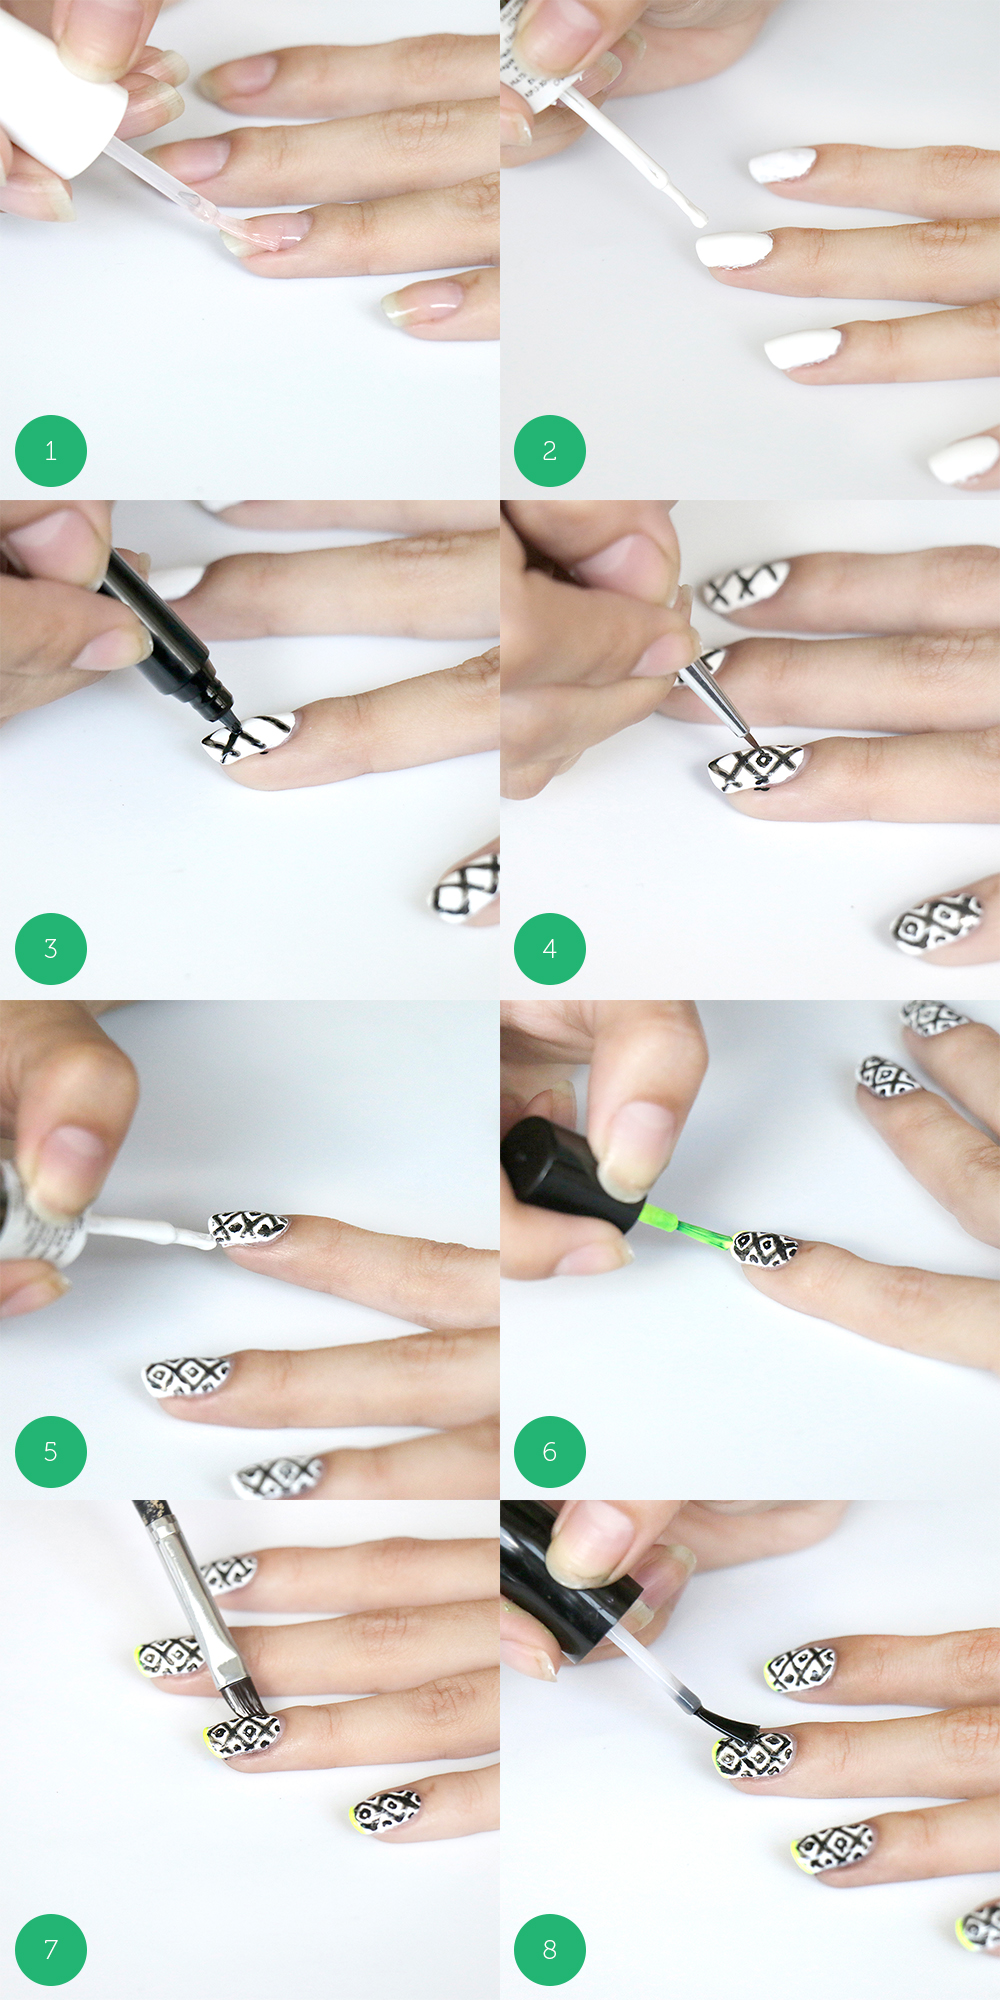
1. Apply a base coat.
2. With a white polish, apply two coats in every single nail and let t dry.
3. For this step you can use a brush or a nailart pen. I used a nailart pen to make diagonal lines which form the big diamond shapes, only the silhouette.
4. Then, with a thin detail brush or nailart pen make a smaller diamond inside the original ones, again, just the silhouette.
5. Because the neon polish is too light, I had to make a white french mani and let it dry before doing the neon one.
6. Now, you are able to apply the neon polish as a french mani.
7. Remove the imperfections with a brush or a cotton swap.
8. And apply a top coat.
Para este Trendy 30th la inspiración vino del nuevo proyecto de una de las personas más bellas y talentosas que tiene Venezuela: Sheryl Rubio. Ella es una joven actriz y cantante que acaba de lanzar su nueva línea de ropa junto con la marca Melao. La colección incluye varias piezas y cada una me gustaba más que la otra, por lo cual me tomó un poco de tiempo decidirme por una sola para este post pero finalmente me decidí por el Jumper Capuchino por su trama y el sutil toque neón que tiene, detalles perfectos para un diseño de nailart.
La mejor parte de este post, y lo que lo hace especial, es que tengo la suerte de conocer a Sheryl desde hace unos de años y puedo decir sin lugar a dudas que no es solamente increíblemente talentosa sino que es un ser humano excepcional, auténtica y con una actitud realmente positiva hacia la vida. La verdad estoy muy feliz por ella y si quieren saber más les recomiendo que la sigan en sus Redes Sociales y que busquen el hashtag #SherylRubioParaMelao.
Ahora bien, regresando al mani, debo reconocer que lograr el patrón de la braga fue más difícil de lo que pensé ya que los rombos que lo conforma son irregulares y esa es una técnica en la que aun estoy trabajando, me cuesta que ese efecto se vea prolijo y no como un gran manchon. Así que teniendo eso en cuenta, estos son los pasos para llevar el Jumper Capuchino a tus uñas:
1. Aplica una capa de pintura base.
2. Utilizando un esmalte blanco, aplica dos capas en cada una de tus uñas y déjalas secar.
3. Para este paso puedes utilizar una brocha o un lápiz de nailart, yo utilicé un lápiz para hacer las líneas diagonales que forman la silueta de los rombos principales.
4. Luego, con una brocha o un lápiz más fino, haz siluetas de rombos más pequeñas dentro de los originales.
5. Dado que la pintura neón es muy tenue, antes de aplicarla haz una línea de manicure frances con un esmalte blanco en cada una de tus uñas y déjalas secar.
6. Ahora sí podrás aplicar el frances neón.
7. Remueve las imperfecciones con una brocha o un hisopo.
8. Y aplica un brillo.